Table of Contents
I’m a big fan of Synty Studio Assets because they are high-quality and look great. However, one issue with these assets is that their environments are all tile-based.
One limitation of Synty Studio Assets is that their roads are flat tiles, which can restrict your game world to flat terrain.
However, you can overcome this by using a tool like Easy Roads 3D. This tool lets you create roads that adapt to the terrain underneath, allowing your streets to be on nonflat terrain.
However, The roads in Synty Studio assets have a unique look and style that doesn’t visually match the default road style of Easy Roads.
For example, you wouldn’t want high-textured roads in a low-poly apocalyptic environment.
So, how can you use Synty Studio Tiles with Easy Roads 3D? You can’t, but you can make a custom road tile and apply the Synty road texture, ensuring your roads match the rest of your game world. In this post, I’ll show you how to do that.
Creating A Custom Road Object In Easy Roads
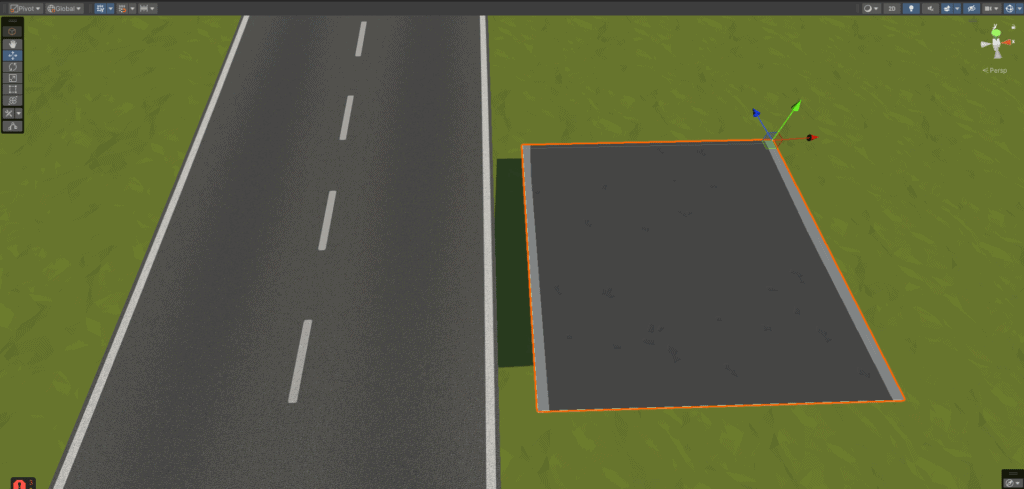
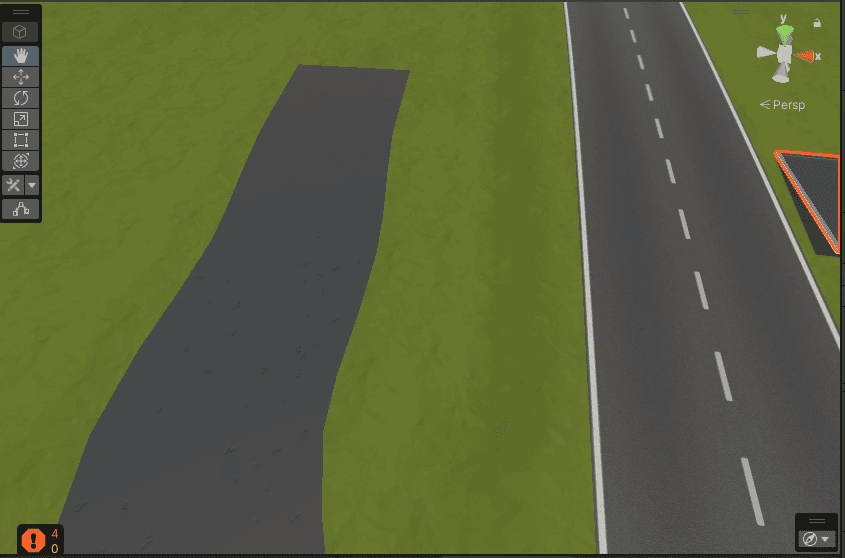
Before we start building our road, let’s first look at the issue. The Image below compares Synty Road Tile with the default Road Object in Easy Roads.
Notice the difference in the Textures that each road uses?
The goal here is to build our road with EasyRoads in the same style of Texture as the Synty Road Tile on the right.
Step 1: Creating The Road Texture
The first thing we want to do is left click on the Prefab named “SM_Env_Road_Lines_01.” This prefab is located in the “PlygonApocalypse/Prefabs/Environment” folder.
With the prefab selected expand the Shader options and click on the box next to “Base Map” as indicated in the image below:
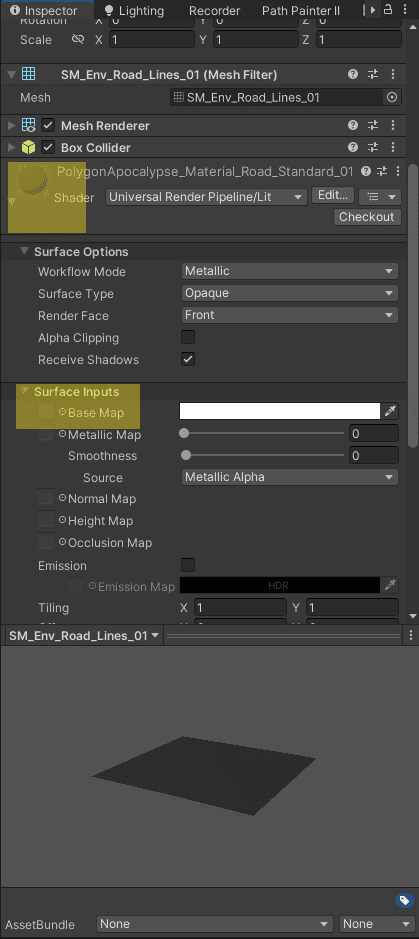
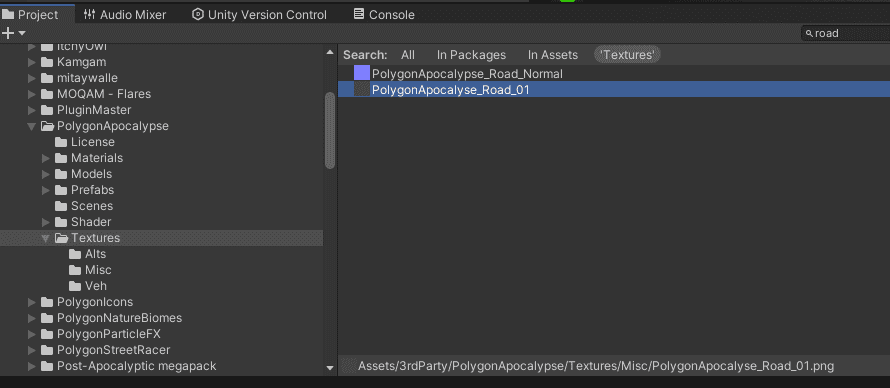
This will locate the road texture in the project hierarchy panel. It should be called “PolygonApocalypse_Road_1“.
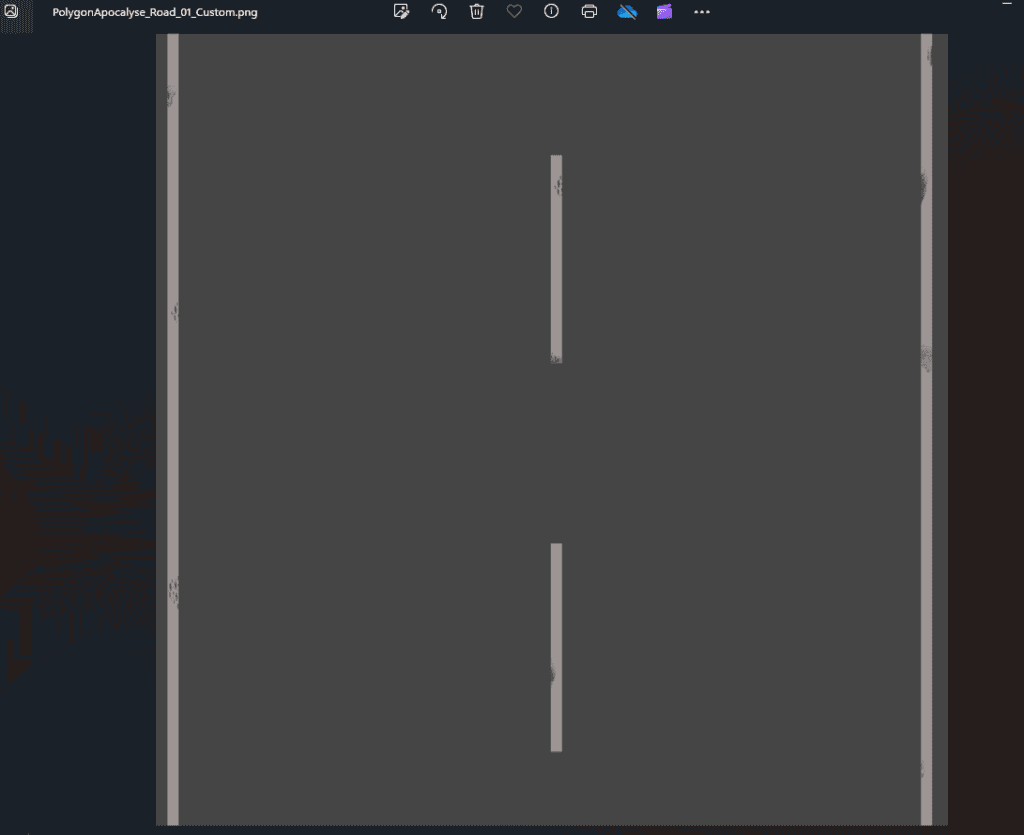
Next, open the file in an image editor. I use Affinity Photo, but any will do. With the texture open, notice the row of colors in the bottom left corner. We want to write over those colors with the color of the asphalt.
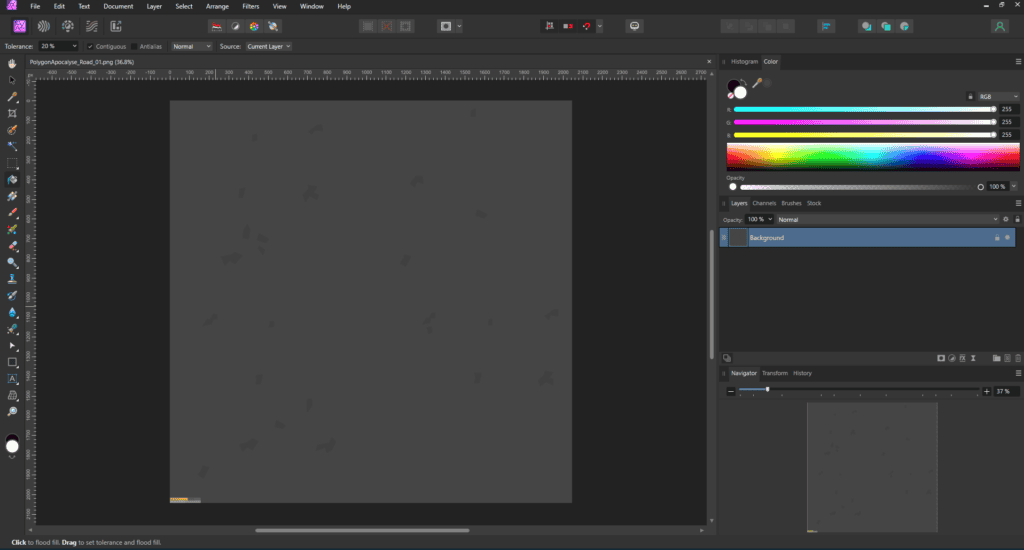
Use the eyedrop tool in your editor to extract the primary color from the asphalt texture. Next, select the row of colors with the select tool and use the paint bucket to fill only the selected colors. The final texture should look like this.
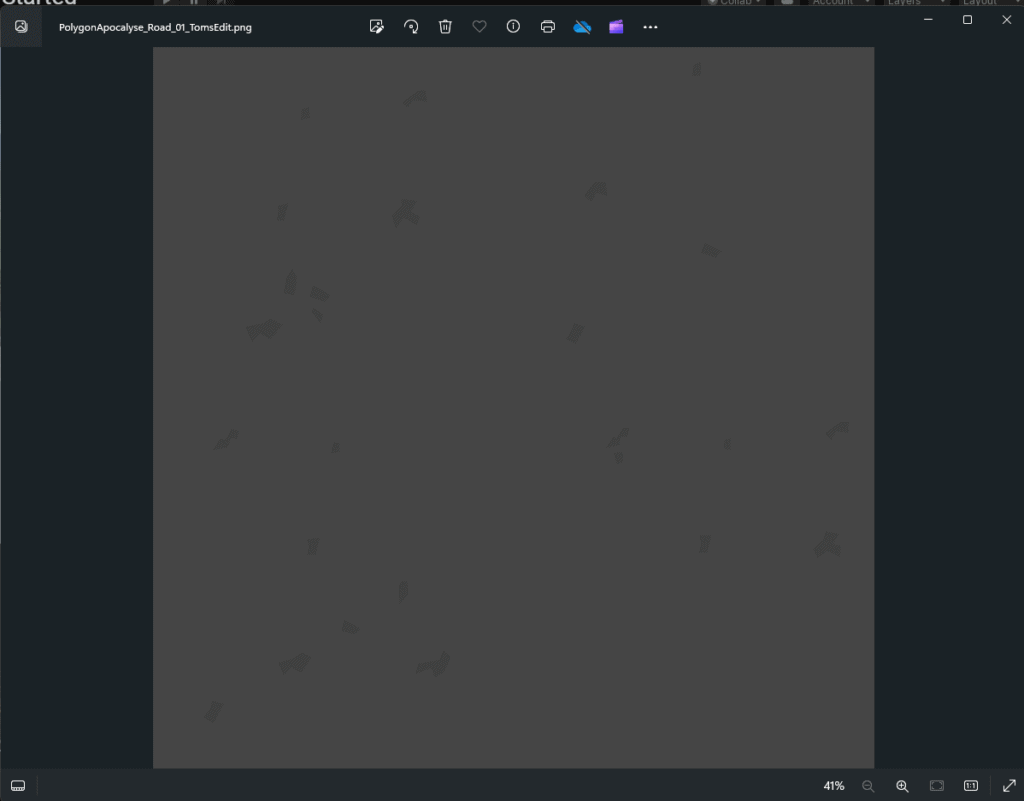
Save your image with a new name to ensure we leave the original texture in working order. I called mine “PolygonApocalypse_Road_1_Toms“.
Step 2: Creating The Road Object
Next, let’s add a “New Road Network” to the scene. This will allow us to use our newly created road texture and create our custom road object.
With the Road Network selected in the Hierarchy click on the settings tab in Easy Roads.
- For Road Type make sure Default Road is selected
- Click on the Duplicate Road Type Button.
- Under Road Type Name enter “Synty Road“
- Road Material List should be Set to Default Road.
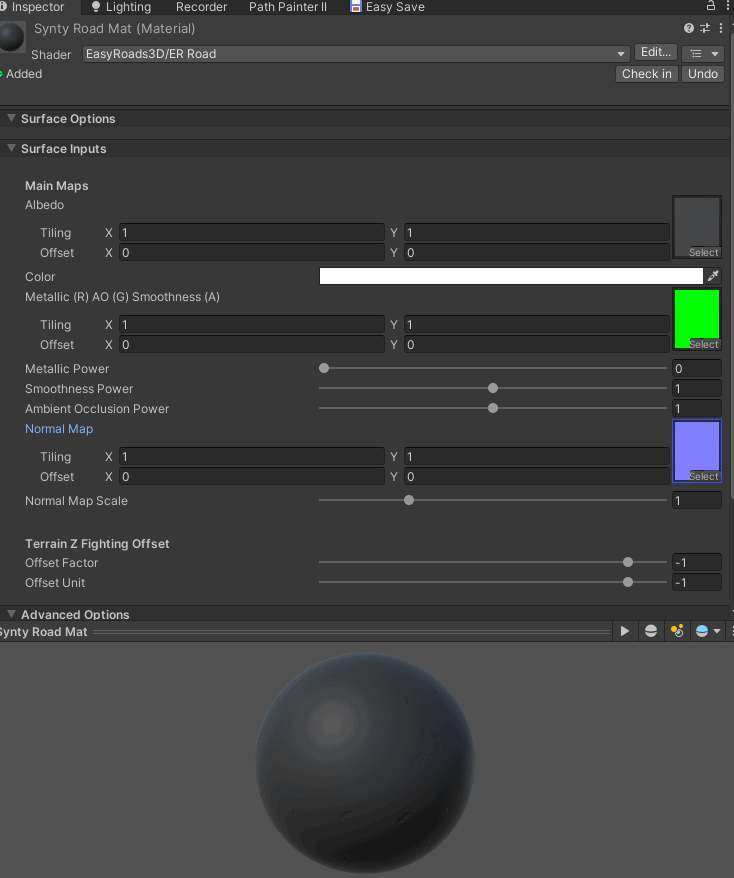
- Click on the Default Road Material, make a copy of it in the Project Explorer, and give it the name SyntyRoadMat. We are using that Material for the Road Material setting.
- Next, we want to configure our newly created “SyntyRoadMat” with our PolygonApocalypse_Road_1_Toms texture. To do so, drag the texture to the albedo box.
- We also want to drag and drop the PolygonApocalypse_Road_Normal to the normal Map section. This will give the little cracks and holes in the asphalt.
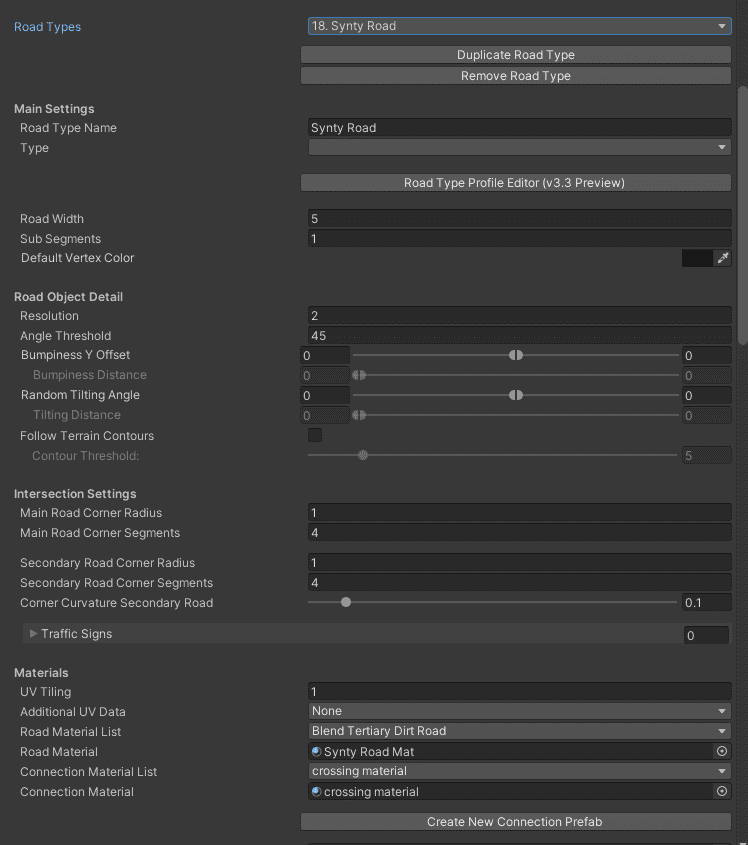
With our Synty Road object created click on the Add Road Object. If all went well, under Type you should see “Synty Road” in the dropdown box. Select it and the click on Add New object.
To place roads on your terrain make sure the road network is selected in the hierarchy and shift and left click to place markers and build your road.
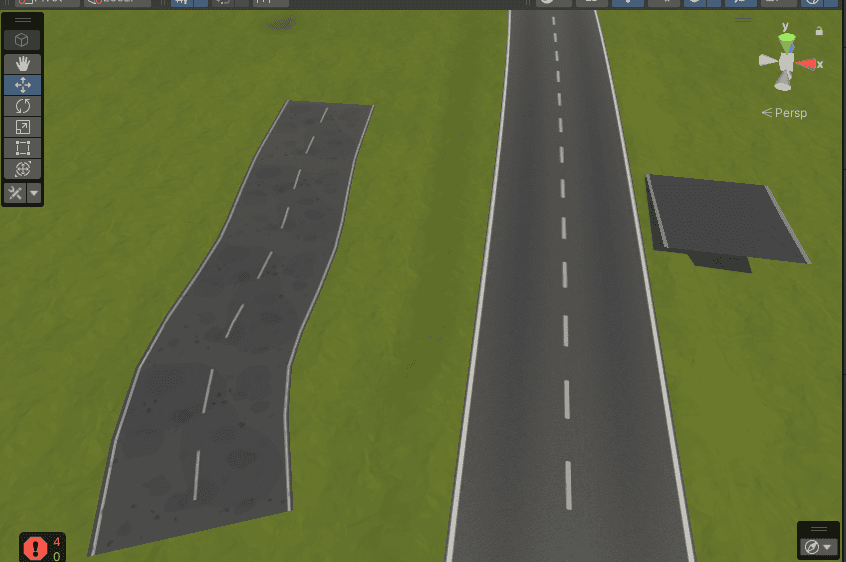
In the image above you can see the road I created with the Synty Texture. You may be wondering what happened to the white lines?
If you want them included you will need to modify the PolygonApocalypse_Road_1_Toms texture to include them. You can easily add that by editing the texture in Affinity photo or similar tool. Below is the final result of the texture and our newly created road in a scene. (Note: Dont forget to update your material if you create a new texture for the lined road.)
Shader Flickering Issue
One issue you may face when using Easy Roads 3D is road flickering, where the roads alternate between black and white. This bug is related to shader incompatibility with the Forward+ renderer.
I encountered and reported this flickering problem to the Easy Roads developer during testing. They confirmed it was a known issue and provided updated shaders to resolve it.
You can either change to Forward or Deferred render or request updated shaders from Easy Roads.
Below is the link to the forum thread:
Final Thoughts
Using custom road textures with Easy Roads 3D allows you to seamlessly integrate high-quality assets like Synty Studio Assets into your game world. By following the steps outlined in this tutorial, you can create roads that adapt to the terrain while maintaining the unique visual style of your chosen asset pack.
Remember, the key steps are:
- Extract and modify the desired road texture from the asset pack.
- Create a new road type in Easy Roads 3D and assign the custom texture to the road material.
- Add the custom road object to the scene and build your roads.
I hope you found this useful.
Check out the article below for more useful assets I use regularly.
🚀 Join the Adventure Behind the Scenes! 🚀
Are you ready to dive deeper into the world of “Diminishing Light” and keep informed on the latest developments? Sign up for my exclusive mailing list and get the insider scoop straight to your inbox!
But wait, there’s more ways to connect! Follow my journey on social media:
👾 Follow me on Instagram for a snapshot of our latest thrilling game developments.
🐦 Tweet along with me on Twitter and join the game dev conversation.
📘 Like me on Facebook to be part of our growing community of game enthusiasts.
Don’t forget to share your thoughts and ideas in the comments. Your feedback influences the game development. Let’s create something fun together!